Whether you’re tired of tweezing random chin hairs or are fighting the battle of a fuzzy upper lip, you might be tempted to try a home facial waxing kit. Waxing is an efficient way to remove hair, and lasts an average of three to four weeks, but it can be a little intimidating. Fear not! Here’s the low down on my top three choices, plus a few tips on how to make the process as comfortable as possible.
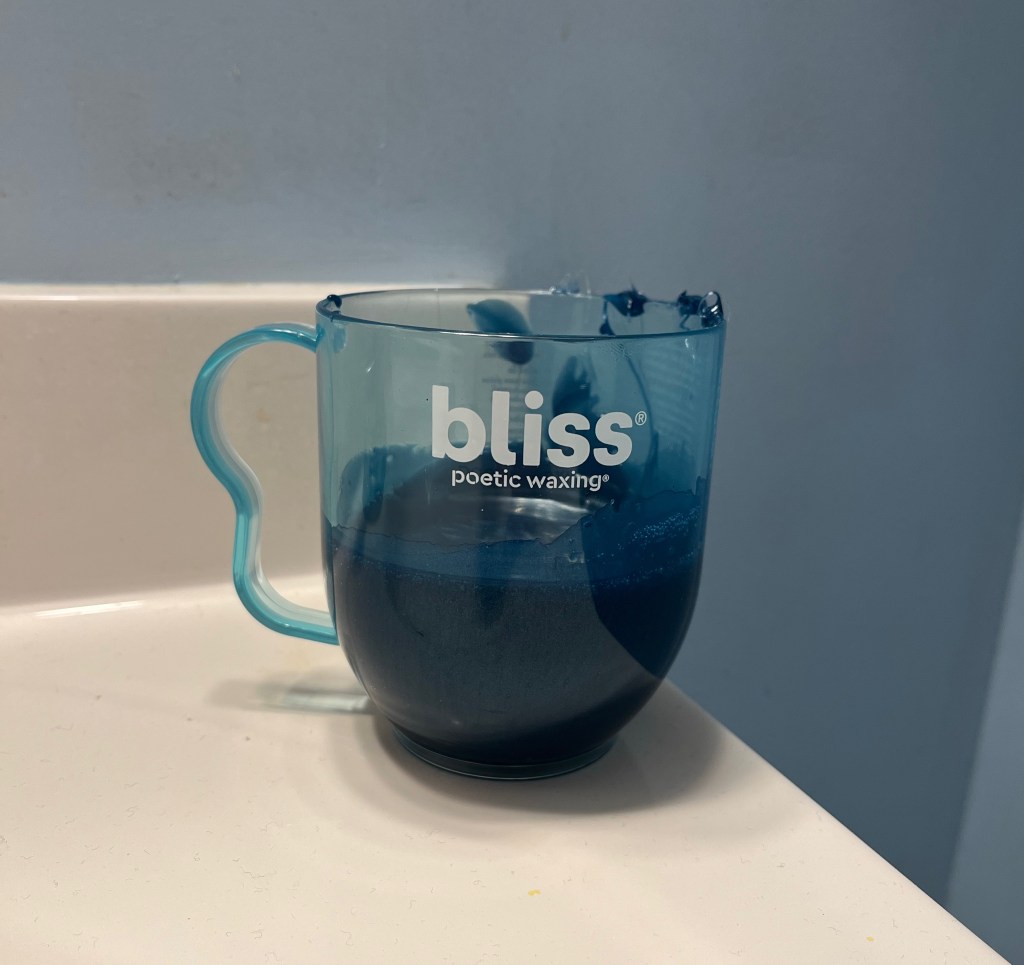
1. Poetic Waxing At Home Wax Kit. While this kit is the hardest to use, it also delivers salon-quality results. The kit comes with a microwave-safe cup filled with hard wax, four application spatulas, and a bottle of pre- and post-waxing oil. You simply heat the cup in the microwave for 30 seconds at a time, until the wax is visibly melted on the surface. Then you stir it. Prep your skin with a little of the pre-waxing oil. When the wax is the consistency of thick honey, and not molten lava hot, use a spatula to apply a generous layer to the area to be waxed. It hardens almost instantly. Once it does, you simply pull off the wax (in the opposite direction of hair growth) and voila! Repeat as necessary until all hair is removed. Finish with a little more of the oil. The waxing part only takes a minute. For me, the most time consuming part of the process was waiting for my wax to cool down to right temperature and consistency after it finally melted all the way through. It took about 30 minutes to get there. Note: it’s important to follow the instructions and wait until the wax is the right consistency before applying. If you try to do it when the wax is too thin, it will get everywhere. Trust me on this.
2. Sally Hansen Hair Remover Wax Strip Kit. If you’re intimidated by hot wax or simply don’t have the time to wait for it to melt, wax strip kits are affordable and speedy. The downside is that the wax on these strips isn’t meant to be applied to an area repeatedly. So if you don’t get all the hair on your first pass, you’ll need to tweeze (or risk major skin irritation). That said, these strips are easy to use (they were my go-to for years) and generally do a good job of grabbing most hairs. The kit comes with pre-waxed strips and a bottle of finishing oil. With this kit, you warm the strips between your hands to soften the wax, then peel them apart – each “strip” is actually two. Apply a strip in the direction of hair growth and then quickly remove in the opposite direction. Finish with some of the oil. Note: of all the kits, I find this is the one most likely to cause skin irritation.
3. Veet Ready-To-Use Wax Strip Kit. Another strip kit, this one is the easiest to use of the three. It’s also the most gentle, but also the most likely to leave hair behind. However, if you have highly sensitive skin, this would be my recommendation. With these strips, you don’t even have to warm them between your hands. Just pull them apart, apply in the direction of hair growth, and remove in the opposite direction. This kit comes with pre-moistened finishing wipes to complete the process.
Pro Tips
1. To keep pain/redness/adverse skin reactions to a minimum, consider taking ibuprofen and an antihistamine about an hour before you wax.
2. Always wash and dry the area to be waxed before you begin.
3. Apply pressure (you can just use your hand) to the area immediately after pulling off the wax. You only need to do this for a moment, but it helps keep discomfort at bay.
4. Use the finishing oil! It helps remove wax residue and soothe skin.
5. Chill out. For me, my skin looks red and a little angry for about an hour after waxing. But if I’m able to sit still and relax, it tends to calm down faster.

Leave a comment